Juno has been providing dial-up services for the better part of 15 years. It began offering free email accounts in 1996. However, these days, Juno is now a subsidiary of United Online. Now www.juno.com provides dial-up and DSL internet services to cities in the US and Canada, having gone through various transformations over the years.
With Juno.com, you get fast internet speeds, you get email with spam protection, Norton AntiVirus and pop-up blocker. You get all this for $16.95 a month, with the entire first month free.
This article will take you through a simple step-by-step process on How to Sign up Online, Login, Download, and Install Juno Turbo or Platinum.
Juno Email Login – Sign Up for Email On The Web
1. Go to the website (www.juno.com) and select either Juno Platinum or Juno Turbo with Platinum.
2. Click the “Sign Up” button for the process to begin.
3. Enter your phone number. This will allow Juno to check if there is a Juno access number in your area. When you have done that, click “Next”.
If there aren’t any access numbers in your area, you will get a screen informing you of that. This screen will give you three options;
- One, where you decide if you want to continue signing up even without the presence of that access number.
- Second is one where you decide if you want Juno to check for a different access number if you will be using Juno for travel.
- In the last one, Juno asks if you would like them to notify you if and when service becomes available in your area. All these options have separate buttons for you to click on.
4. In the next step, you will get another dialogue box asking you to fill out the necessary boxes. This is the part you create a member ID and password. This member ID will also be used as your Juno email address. Like any other email service, it will ask for your username (member ID), password (and confirmation) and a few other miscellaneous things.
5. At the very bottom, you will see terms and conditions. Read them (or not) and click “I Agree”. Your member ID has to be unique, so if you have chosen one that is already taken, you will be asked to choose another.
6. You will then be taken to the “Select an Offer Screen”. This is pretty straightforward—when you see the plan you want, click the checkbox next to it.
7. When you click “Next”, you will get another screen. This is the “Provide Payment Information” screen. Provide your name, your address, your city and other personal information. Click “Submit” ONCE so you do not receive duplicate charges.
8. You will then get a “Download Now!” screen. It is advisable to print out this page incase you forget the information it contains.
Juno Download and Install – Next Steps on juno.com
9. Click the “Download Now” button.
10. When the download is complete, you will get a dialogue box. Click “Install”.
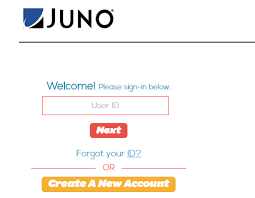
11. Once the process is done and you now have Juno on your computer, a “Welcome” screen will pop up. It will ask for your member ID, password (and a checkbox asking whether or not you want to save your password) and location.
12. With that, everything is done. Just click “Connect” and you have successfully logged in to Juno.com.
This was the whole process of getting started with www.juno.com. Once you have logged into juno, you can use their webmail service which they call it as email on the web.
Incoming search terms:
- @juno com
- juno com email sign in
- juno email login
- juno com email login
- juno account login
- juno com signin email
- @juno com email
- juno email login page
- juno email on the web
- juno mail signin
- juno web email login
- juno webmail login
